Friday, January 18, 2008

Pricilla Gone Missing

Game url: http://www.gamegarage.co.uk/adventure-games/pricilla-gone-missing/

Dear Ernie
Your aunt Prissy has gone missing
Please come investigate

Mouse to point and click. Inventory can be combined with other items.

Spoilers, Hints and Walkthrough for Pricilla Gone Missing

[Show Spoiler]
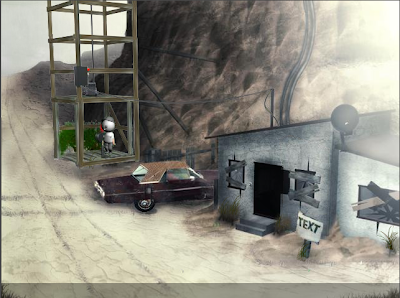
1. Go in the building & turn on the light on the left just inside.
2. Pick up the piece of paper from the file cabinet.
3. Turn the power box…You will see a lightning bolt on the box.
4. Go outside and continue to the right side of the scene (to take you to another scene).
5. Grab the lighter in the pebbles beneath the chair.
6. Grab the black wire from inside the stove.
7. Go back to the scene with the car, & go up the elevator behind the car.
8. Take a look in the binoculars at the top (nest to the right side of the shed)…note this is where the game is trying to take you.
9. Go into the shed, then grab the bottle & the hook.
10. Continue left to enter a new scene with a bird on a line.
11. Go to the far platform and click to move the crank and lift a basket.
12. Click on the rope in the basket to get it.
13. Put the hook with the rope to attach them together.
14. Go into the building near the bird, & get the crowbar from in the bed (under the covers).
15 Go back outside & note the furnace beside the left side of the building.
16. Put the paper in the furnace, set it on fire with the lighter, and a funnel will shoot out.
17. Retrieve the funnel & add it to the bottle, & then add the black wire in the funnel bottle combo.
18. Go down the path behind the bird, inside the fence.
19. At the end of the path, put the rope with the hook on to the crane.
20. Go back up to the butane tank just shortly up the pathway.
21. Use the crowbar on the butane tank until it is released (3x’s should do it), falls, & blows up.
22. Go back to the elevator & go down to the car.
23. Put the bottle combo into the gas tank of the car to fill it with gasoline.
24. Go to the scene of the porta-potty, and stove…this is where things blew up after the butane tank fell.
25. In that scene, hook the black gear to the basket.
26. Grab another black wire from the ground (right side of scene hidden under the dirt, & may have to click a bit to find it).
27. Go back up the elevator and go up…past the bird…back down the path behind it & to the crane you added the rope & hook to.
28. Pour, the gasoline from the car, it into the crane tank.
29. Click on the engine to start, & it will go pick up the basket with the gear off the ground.
30. Go back to the bird scene & click the basket to get in it.
31. Click on the paper on the right box attached to the parachute.
32. It reads “opla.”
33. Click on the entrance keypad to the door of the building in the middle.
34. Solve the code on the door of the little building in the middle by matching up the letters (on the #pad) with o-p-l-a in that order.
35. Get into the elevator.
Arrrgh… the game says “to be continued…”


SpoilerZ url: http://gamescaperoom.com

Friday, January 11, 2008

Princess Natasha No Vacancy

Game url: http://kids.aol.com/games/online-games/princess-natasha-no-vacancy

Solve clues and defeat robots so Natasha and her friends can escape from the secret robot factory!


Spoilers, Hints and Walkthrough for Princess Natasha No Vacancy

[Show Spoiler]
PART ONE

1. Go left. Take the lighter from the boy.
2. Take the beehive from the tree.
3. Go left again.
4. Click the beehive in your inventory and click the small branch sticking out of the tree.
6. Click the lighter, then click on the cave. Take the radio, the skeleton leg, the book with the key, and the coins. Exit the cave. Put the lighter back in your inventory.
7. Go right twice so you are facing the gate again. Click the key in your inventory and unlock the gate.

PART TWO
8.Click the tank or suffer a watery death like the last guy.
9. Go left and click on the odd vending machine. Click on the coin in your inventory and put it in the slot. Click the "He" (helium) button and take the tank.
10. Back up from the machine and go right twice so you are facing a small grotto with a dead fish and a chest in it. Click the skeleton leg and use it on the chest and BANG! it splits at the seams .
11. Go back to the vending machine, and repeat step 9, but pressing the C3H8 (propane) button. Take this tank as well and back up.
12. Click the propane tank in your inventory and click the not-pointy end of the hose. Click the lighter and light the end of your new blowtorch by clicking on the pointy end this time. Click your new weapon of doom so it goes into your inventory, then go right.
13. Click the blowtorch then click the grate. Go right.
14. Click the helium tank and fill the octopus and watch the short cutscene.

PART THREE

15.Click the red book the boy is reading, and read each section.
16. Go left, note the drawing on the wall, and open the parrot cage. Go ahead, he won't fly away.
17. Go right twice. Skipping a time consuming part of the game, click on the door and and click "Whisper", "Tall", and "Hello", then click the lever that is revealed. Otherwise, click the dining dish, click "TREBUH", go to the parrot room, feed it to the parrot, go back to the door, and put the parrot on the perch (yellow flagpole). Go back to the room with the annoying little boy who WON'T STOP BOUNCING ON THE BED and click on the grate on the floor behind the bird cage. Go back to the parrot and click him. He will say "Shout a short goodbye". Put in the password given above (if you read the book, blue parrots say the opposite of the adjectives they repeat) and click the lever.
18. Go left. Click the arrows above and below the STOP buttons until all are orange eyes (remember the I.I.I. drawing?) and stare at the pretty lights for a second until that ugly Kim Possible ripoff with the horrible posture runs downstairs through the trapdoor.

PART FOUR

19. Go right and click the box on the wall with the blank pink keycard on it. Read the note and click the R on the second square of the second row from top left.
20. Go left twice and use the keycard on the box.
21. Quickly put your fingers on the ASD and JKL keys. To defeat them, press the letter on the approaching robot's chest when it flashes white. Quickly dispose of these easy adversaries .
22. Take everything on the desk, then click the hammer and smash the glass. Get out of the room.
23. Click your family to free them. Follow them to the right.
24. Click the onion in your inventory and feed it to your family, turning their eyes red. Enjoy ending.


SpoilerZ url: http://gamesuy.blogspot.com

Wednesday, January 9, 2008

Hapland

Game url: http://foon.co.uk/farcade/hapland/

Light both the torches and open that big ol' portal.
Try not to kill too many people in the process.


Spoilers, Hints and Walkthrough for Hapland

[Show Spoiler]
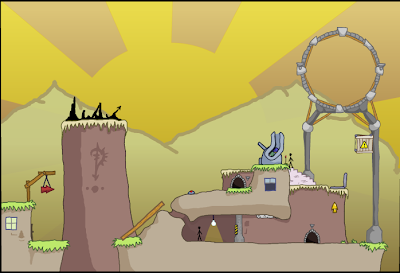
Ok, to begin. First click on the grey slab directly above the yellow arrow. This opens the hatch where the people you control come from. Secondly click the yellow arrow to command your first stickman. He'll walk up to the steps to the lever, which is next to a cannon shaped device. Click the stickman next to the cannon to fire the first stone downwards so it knocks over the blank of wood, forming a bridge over the gap.

Now, open the window on the left, by clicking on it. Also click on the red arrow, to switch it's direction so it is pointing to the right. Click on the cannon so it is pointing upwards. Click the stickman next to the cannon again to fire the second stone that should ring the bell. Because you opened the window, the door on the left opens. Note that the stone now rests on the spike which makes it unable to be moved.

The next action requires the first bit of timing. Click the cannon so it is facing downwards. Click the cannon but get ready to click the blank of wood so it jumps upwards slightly. As soon as you launch the rock you must be ready to click the plank. You have to time it so the blank of wood knocks the "stone" in mid-air. Kaboom. That ain't no stone mister, that's a bomb. Repeat this action for the second bomb.

Fire the last stone downwards and if by magic it lands in the cave. The little stickman here picks up the stone and uses it on the metal/grey post. It's a keycard and the post reclines into the ground above leaving the stickman free!

Click on the stickman next to the cannon. Because there are no stones left the steps move up and tip him into the cannon. Click the yellow arrow, again to acquire another stickman. Click the cannon so it's positioning to fire upwards. This next part requires some more timing. Click the stickman next to the cannon to fire the other poor stickman up into the air. Just before the super-stickman is about to be impailed, click the spike so it flexes and allows him safe passage over. Click on this guy now and he pushes the bell tower over to the right. Click on the bell three times so it falls onto the spike. This projects the stone onto the mine below allowing safe passage for the guy in the house on the left.

Now the mine is out of the way you can click on the door, which is on the left of the screen. Another stickman appears. He checks the arrow and moves in the direction it states (to the right). He walks across the plank of wood, past where the mine was and into the open door. When the door closes the flame outside the house, the light inside the house and the first flame on the portal are all lit.

Now you're onto the last stage. This is all about timing. Ok? Ready?

Click the stickman who's at the bottom of the screen (the one who was in the cave). When you do this a razor-creature-thing falls from the hazard crate on the right. Just before the creature touches the ground, open the window where the stickman has just turned the light on. If you time it correctly, as the stickman closes the window the rocks below are nudged and fall onto the razor-creature-thing. The stickman is then free to walk into the cave, lighting the second flame and opening the portal!

Congratulations, you have now finished the game!


SpoilerZ url: http://www.trovster.com

Tuesday, January 8, 2008

Warbears Mission 1

Game url: http://www.warbears.com/missions.php?id=1

Commander!!
We need your help!
We have a big problem at Bedtime's bank.


Spoilers, Hints and Walkthrough for Warbears Mission 1

[Show Spoiler]
OBJECTIVE ONE: GET KLA INTO THE BANK
Ryoh is on the roof. Alert the Groundhog nearby and kill him. Don’t get hit for a 50 points bonus.
Move over to the wireless antenna’s locked box and try to open it. Ryoh will inform you that the locked box is indeed locked. Use the speech bubble to alert the other Groundhog. He will give you the key, then challenge you to a duel. Kill him as well–don’t get hit for another fifty. Go to the left after you successfully kill him.
NOW. Here’s the fusebox puzzle made easy. Click on the top left box. This should make the entire thing turn red. Now click the middle. Now the top right. Now the bottom right. Now the top left. Now the bottom left.
Exit the fusebox and move him once to the left.
Now down to Lucas! Put the mouse over him and jump up on the car. Grab the drill and hop back down. Click the drill icon to drill into the wall, then hop on.
Mouse over Kla and hop on. Lucas will help him up. You’re in! 100 points
OBJECTIVE ONE — COMPLETE!

HIDDEN OBJECTIVE A: FLOWER NUMBER ONE
As Lucas, hop off the drill. Then click the drill icon again to remove it.
Now to Kla. Mouse over him and click on the waterdrop to turn on the tap. Now, again. Now again–o noes it’s broken. No, this is good. Leave the window open. Eventually the water will flow over the windowsill and grow a flower. Flowers bring joy–AND 100 points.
HIDDEN OBJECTIVE A — COMPLETE!

OBJECTIVE TWO: INFILTRATE FIRST FLOOR OFFICES
Mouse over Kla and charge the battery–you won’t get zapped don’t worry. After the battery is charged, open up the Arial.
This minigame is pretty simple, no tips really. Just watch closely and mimic the colors/tones. Be warned–the first round is only three tones. Then four. Then five. Once you’re into the system, turn off the vents, turn on the lifts, and turn off the security cameras. If you didn’t make any mistakes while hacking, you have a cool fifty.
Mouse over Lucas–lob a grenade. Then, when the game allows you, hop up on the truck. When it detonates, it’ll loosen the elevator doors the chair locking Kla in is wedged against. Hop back down.
Back to Kla. Close the window, then hit the door once. That’ll knock the chair down–open the door again and exit. Make sure to leave the door open for the sake of something I’ll tell you later.
OBJECTIVE TWO — COMPLETE!

OBJECTIVE THREE: CONTACT AGENT STEVE
Still as Kla, head over twice and up the stairs.
Once you get to the second floor offices, move once to the right and dial the phone. Kla will order a pizza–eventually Steve will arrive on a coincidentally stolen pizza bike. Another cool hundred for you!
OBJECTIVE THREE — COMPLETE!

HIDDEN OBJECTIVE B: FLOWER NUMBER TWO
Have Steve climb up the tree. Mouse over him and select the option with the target of a door. Careful shooting will net you a cool fifty. Now that the door is unlocked, have Kla go back downstairs and open it. Now head back over to the left twice and close the bathroom door. Let the room fill up but don’t wait TOO long. When it is full, open the door to send a tidal wave across the offices into the copy room and grow another flower. More joy and another hundred points!
HIDDEN OBJECTIVE B — COMPLETE!

OBJECTIVE FOUR: CREATE VAULT ENTRY POINT
Simply close the door and let it alone. Eventually, the floor will collapse, providing an entry point for later–but you need to rescue the hostages first.
OBJECTIVE FOUR — COMPLETE!

OBJECTIVE FIVE: GET LUCAS ONTO THE ROOF
Go over to Ryoh. He should be as far to the left as he can go. Slice the antenna. The Arial will be damaged, but it’ll be worth it–the metal conductor sphere will knock over the left bank sign, giving Lucas a way up. Sort of.
Back down to Lucas. Lob a grenade and hop back up on the car. You’ll notice that there’s a curvy arrow, one that I hope you haven’t used yet? Click it. Lucas will ride the explosion up to the top of the building and net you another hundred.
OBJECTIVE FIVE — COMPLETE!

OBJECTIVE SIX: GET RYOH INTO BANK AND RESCUE SECOND FLOOR HOSTAGES
Head Kla over to the computers in the first floor offices. Access them and hack–it’s the same deal as last time, except there’s a fifth tonal option. Once you’re in, turn the ventilation back on. Perfect hacking gets you another fifty.
Up to Lucas–you now have the option to lob a smoke bomb through the vents. Please do so. The Groundhog inside will open a window to flood the smoke.
Now for Ryoh! Head him over as far right as he can go, then slice the sign. Once you do, you’ll see he can go farther right now. He’ll hop off and stick a sword into the window.
Now over to Stevie in the tree. Take aim at the Groundhog in the window–fifty for a perfect. Ryoh will fall down, as the window will move, and swing through the second floor window. Defeat the Groundhog in combat–CAREFUL. He almost always goes for a low stab right away, and since you start with a high block, I recommend a quick counter attack. Perfect swordplay nets you another fifty.
Now free the hostages for another hundred points.
OBJECTIVE SIX — COMPLETE!

OBJECTIVE SEVEN: RESCUE THE LOBBY HOSTAGES
Mouse over to Steve and head down. The pizza guy will arrive and deliver his pizza, causing the moronic Groundhogs to open the door. Once the pizza guy leaves, you can climb down. They won’t see you. Take aim and fire at the first one. His friend will think he had a heart attack–and not care, no less. Shoot the other. Two perfect shots nets you a cool hundred here.
Head inside the lobby and free the girls for a hundred. Head back outside.
OBJECTIVE SEVEN — COMPLETE!

OBJECTIVE EIGHT: REACH THE SECURITY LEVEL AND RESCUE ITS HOSTAGES
If you’re playing as written, Kla should be on the first floor by a computer. Head him all the way over to the copy room with its flower. Photocopy your face. Now head up to the second floor.
When you get there, open the window. Now move over, mouse Kla, and click the paper logo. You’ll drop the paper under the door and make the Groundhog on the other side thing he’s being attacked by a Warbear. My God these guys are dumb. Anyway, he’ll be bumping on that door so you might as well let him in–and let him run out the window and die. The cleverness of that kill nets you a hundred.
Head out of the room to the right and open the door to where the hostages and Ryoh are. Now head up to the security level. You get a hundred big ones for reaching the mainframe–now walk over to the right, so Kla’s in front of the mainframe.
Now back to Ryoh. Head to the left. He’ll get attacked by a spider and run back. (Yes, seriously.) Not to worry, there’s a new option! Mouse over him and click the odd ‘down’ arrow. Ryoh will hop out the window. On the ledge, walk left, then hop back in.
Now simply hit the up arrow to reach the mainframe level. Free the hostages for a hundred clams.
OBJECTIVE EIGHT — COMPLETE!

OBJECTIVE NINE: ACCESS THE MAINFRAME
Dirt simple. Send Ryoh over to the right. Now slice off the padlock on the cabinet. This should reveal a generator switch. Flick it on.
Over to Kla now. Access the mainframe to see what Herr Hogg is up to.
OBJECTIVE NINE — COMPLETE!

OBJECTIVE TEN: PENETRATE THE VAULT
Kla sends the lift up to Lucas. Oblige by heading down. Since you ever so nicely collapsed the floor before, simply open the door in front of you, then hop down.
Mouse Lucas and select the square shaped icon.
You now have to wire a bomb.
Select the bottom of your column of options and place it in the middle of the bottom row, as well as diagonally up and to your left. Now select the top option of wiring (looks like a tire iron) and put it in the final blank. Kla will send down the left and every Groundhog in there will be frozen solid.
Open the vault.
Over to Steve–who has a new option, wow! It looks like a wheel. It is a wheel. Click on it and he’ll ride the bike over to where Lucas is.
Now to Lucas. Walk right and then hop on the scooter. Now get Steve to hop on behind. When you penetrate the vault, the Groundhogs will get away in their molemachine.
OBJECTIVE TEN — COMPLETE!

OBJECTIVE ELEVEN — ELIMINATE THE GROUNDHOG LEADER
The trick to this is not just to use the gas, but the brake/reverse as well to avoid the things they lob at you altogether–they don’t kill you but bog you way, way down.
Steve can take a potshot at a spike-tosser when you have the bike somewhere around the middle between the left side of the screen and the molemachine. You seem to get TWO shots at this to get your points for a kill, so yay! There are three henchmen to kill, and they throw progressively more spikes each time, so the faster you take them out, the less of a headache they are. That’s a hundred and fifty points, if you nailed them all within your allotted two shots.
Now for Adolf Hogler himself! He throws up to four spikes at once, so speed is of the essence, although it’s possible to take him out over a long period of time. Try to stay just behind where the spikes will land, and score a cheapshot inbetween the bounces of two spikes. Another fifty for you, and Steve got to satisfy that lust for killing Nazis we all know he had.
OBJECTIVE ELEVEN — COMPLETE!

OBJECTIVE TWELVE: STOP THE MACHINE!
It’s getting away with the money!
Wait around the middle at take a shot at the entry ramp. That should bring it down and allow you to drive up onto it. Lucas and Steve will get off the bike. Simply use Lucas to walk to the right, and then stop the machine.
OBJECTIVE TWELVE — COMPLETE!
WARBEARS MISSION ONE — COMPLETE!


SpoilerZ url: http://www.kahsoon.com

Monday, January 7, 2008

Warbears An A.R. X-Mas Adventure

Game url: http://www.warbears.com/missions.php?id=a01

It's X-Mas time all around BTC and Kla stops by Bob. But Steve has a secret mission in mind...
Good luck!!!


Spoilers, Hints and Walkthrough for Warbears An A.R. X-Mas Adventure

[Show Spoiler]
1.get the gift
2.open the gift
3.put it on
4.push the A.R. button next to the inventory
- Virtual Robot scene -
5.go to the fur scanner and try it
6.go to bob and say “the fur scanner…”
- Code scene -
7.use the fur scanner again
- Fur Scan scene -
8.get the “Neon lights”
9.get the ” battiers”
10.go to bob and say “Where the wires?”
11.click “Eye” and say “Find item”
- Item Scan scene -
12.get the wires next to the “Hacking device”
- Steve’s Prank scene -
13.click kla’s wallet
14.get the “Taser”
15.get the “BTC map”
16.give bob the “Taser” and the “BTC map”
17.go outside
18.go left or right
19.click the bank
20.go inside the bank
- Withrawl code scene -
21.go very left and get the red cube
22.look at the tree
23.click the “Eye” and say “Blast the tree”
24.get the green cube
25.go up
26.get the blue cube
27.go to the very right on the top
28.click down
29.go right
- Freeze scene -
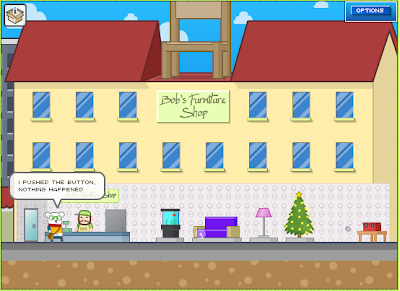
30.Go to Bob’s furniture shop
31.get the “Hacking device”
32.give it to the guy
33.go up
34.use the “Hacking device” on the door panel
35.go in
- Light switch scene -
36.the code is always different so try B-R-G, B-G-R, R-B-G, R-G-B, G-R-B, or G-B-R with the cubes
- Portal scene -
37.go inside
38.get everything in the room
39.put every thing together
40.get the 3 things together and put it on Kla


SpoilerZ url: http://gamesuy.blogspot.com/

Saturday, January 5, 2008

Escape from Rhetundo Island

Game url: http://foon.co.uk/farcade/efri/

Johny Tag
Protagonist action! Control yourself to the exit and save his life.


Spoilers, Hints and Walkthrough for Escape from Rhetundo Island

[Show Spoiler]
Level 1
This one is a real peace of cake. Just click on the eye thingy to drop the bridge.

Level 2
A bomb comes down and makes a crater. Meanwhile, your little dude gets a boom box. It's not so much into music, as in giving him a "special jump move." Click on the "special move" (right side, box with a little guy jumping) and wait until he is near the end of the cliff. Once there, click on the little guy. He'll fly and land on the other side and you will go to level 3.

Level 3
Wait until the rotating arms are about to come level with the ground. Press the stop light so it becomes green, and your guy will pass. Now, let's work on that lift platform. You have to time it carefully, if you raise it too fast he will fall of and if you're to slow he will turn around before reaching the end and again, fall. Little practice and your on the level 4.

Level 4
After picking up boom box, a guy will fall down the cliff. You will have to catch him with the roller thingy and transport him to the other side. Now, click on the special move explode when he steps on the 2nd white part which catapuls him up.

Level 5
Clean your mouse, here things are going fast. Lower the platform, and wait until guy steps on the pole.Click the opposite one to raise it, grab platform and raise it, get the special item board and drop it to create a bridge.

Level 6
Kill bottom man with explosive item. Drop box item on upper man. Click on house. Click the white circle thing to jump up. Then, just fall down where arrow points (to level 7).

Level 7
Just follow the instructions on the picture. Use more tacticts if you want to get an extra life (gold thing on the left side).

Level 8
as soon as man gets box to drop, drop it between him and scissors. When scissors have dropped off end, and face blows bubble gum platform, use your jump to get over box

Level 9
Again, fast work required. Start with the platforms you can drop to create a bridge. Use boxes for last part (may require two).

Level 10
When the guy reaches the end turn him around, jump on the platform, get the bomb box and use it to fall down where the arrow points.

Level 11
Your guy will fall on the right side of the screen, turn around and go left. When he climbes up the stairs, he has to go through the series of flames. Use your mouse to move the flames.


SpoilerZ url: http://www.ajkul.com/

Friday, January 4, 2008

Hapland 2

Game url: http://foon.co.uk/farcade/hapland2

Let's get far in Hapland 2!
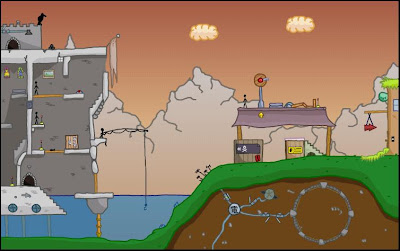
Restore power of the portal in order to ... save a princess or something. Just light the damn torches.
Sometimes helpful symbols are engraved on the walls.
Click on everything! No, really, everything. Even that thin pink thing that doesn't look like it does anything.


Spoilers, Hints and Walkthrough for Hapland 2

[Show Spoiler]
1 - Open the door in the roof
2 - Click on the red dot to turn it into the green arrow
3 - Click the small yellow arrow beneath it to make the stick man walk right and fall through the hole
4 - Click the green arrow to turn it red
5 - Click on the crate the to the right of the stick man to let out a grenade
6- Repeatedly click on the little yellow arrow to make stick man throw the grenade up, which will then be blasted forward by the red dot
7 - Click on the pink plank sitting right on top of the crate (where the grenade came out) until it falls off and makes a ramp
8 - Click on stick man to make him go through the door you just blew up
9 - Open the window to scare the blob down to the ground
10 - Tilt the lamp and turn it on so that light shines on the balls
11 - Click on the crow, which will pick up a ball and fly across the screen
12 - Click on the first cloud as the crow flies by to make it drop the ball on the antennae on the hill below
13 - Click the blob to get it out of the way
14 - Turn on the underground switch to make the light under the steps flicker on
15 - Click the blue arrow pointing right on the circular underground thing, making the wheel rotate clockwise
16 - Click on the stairs to make them move right
17 - Ring the doorbell to make stickman come out and climb onto the roof
18 - Click the crow again to pick up another ball
19 - Click the second cloud as the crow passes by, making it drop the ball into the catapult
20 - Click the first cloud one more time
21 - Click the first cloud for the third time to make it explode
22 - Quickly click on the stickman at the catapult
23 - Click on the man on the top floor of the castle on the left
24 - Click the hatch in the castle
25 - Clicking on the fan in the wall to make the fly bug the other stick man
26 - Once the fly passes through the fan, click the stick man on the right to let him walk safely underneath the suspended crate
27 - Click on the leftmost stick man to make him fall again and so that he's next to the lever
28 - Click on the arrow below the bottom stick man to switch it from left to right
29 - Click on stick man to make the water flow right
30 - Click the middle stick man to open the trapdoor
31 - Click the top stick man to release the suspended crate, a fish will come out of the box and fall into the water
32 - Once the fish hits below stair level, click on the large underwater gate to let the fish flow by and get caught by the fisherman
33 - Turn off the water current by clicking on the appropriate stickman
34 - Click the fisherman, who'll eat the fish and bounce up to the roof of the castle
35 - Click on him when he's on top to light the first torch
36 - Turn on the water current again so that it flows right
37 - Click on the red dot to turn it into a green arrow again
38 - Click the small yellow button to make the stick man at the catapult go inside on the right
39 - Open the window to make another blob come out
40 - Click on the new blob to make it explode the underwater mine
41 - Turn off water current (this might not be needed but just in case)
42 - Click on the blue left arrow on the circular underground switch to make the wheel on the stairs turn counter-clockwise
43 - Click on the stairs to move it next to the crate
44 - Ring the doorbell to let stick man out
45 - Click crate when he's almost to the top of the stairs to make him fall into the crate
46 - Click on the underwater gate in time to let the truck pass
47 - Now flip both underground switches to activate the portal

If you did everything right, you'll win and get a cool end sequence.


SpoilerZ url: http://www.gtds.net/
 

Free Blog Counter